For starters, if you want to follow along with this exercise, you’ll need:
- Docker and Git installed (free)
- Docker Hub and GitHub accounts (free)
When installing Docker, make sure to use a Stable release as opposed to an Edge release, or some functionality found in this post may not work.
Preparing the Application and Spinning Up Jenkins
1. First, make sure you are logged in to GitHub in any web browser. Then fork the Spring PetClinic repository (the example application we’ll use). If you want more of a challenge, swap out Spring PetClinic for your own application.
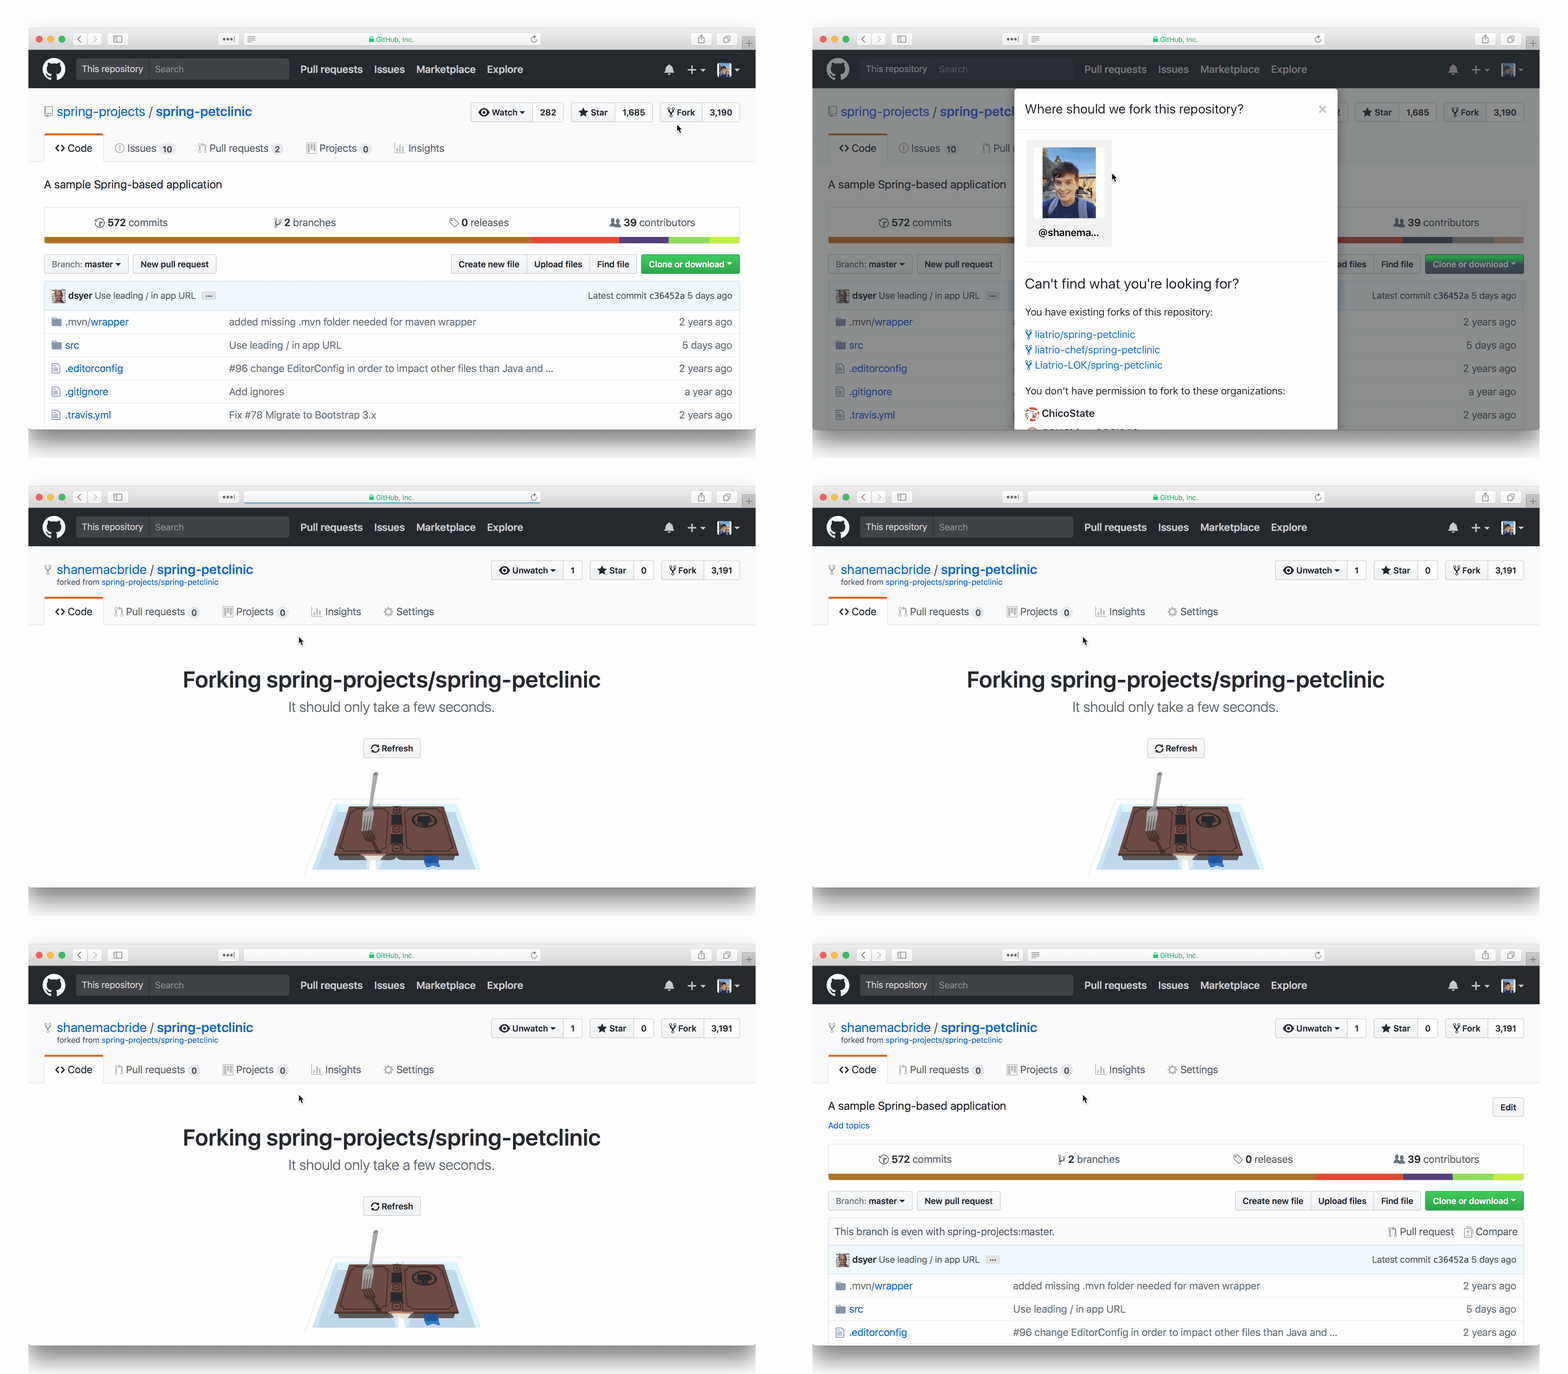
2. Clone your fork locally. Be sure to replace shanemacbride with your own GitHub username. We will do all work within this directory, so cd into it as well.
$ git clone https://github.com/shanemacbride/spring-petclinic.git
$ cd spring-petclinic
3. Start up Docker. Our Jenkins container will make use of it.
4. Use Liatrio’s Alpine-Jenkins image, which is specifically configured for using Docker in pipelines. To spin up the Alpine-Jenkins container and give it access to Docker, use docker run. If you are interested in how the image is configured, be sure to look at the liatrio/alpine-jenkins repository’s Dockerfile for an overview.
$ docker run -p 8080:8080 -v
/var/run/docker.sock:/var/run/docker.sock liatrio/jenkins-alpine
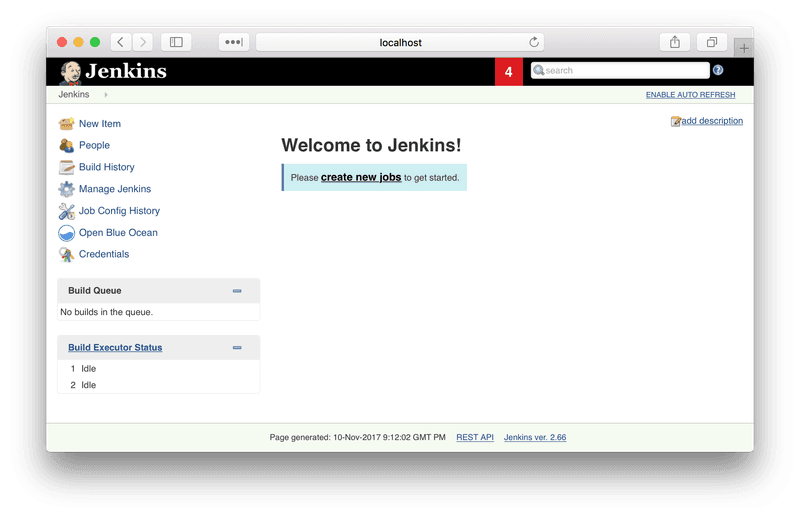
5. Wait for the image to download and run. Afterward, Jenkins should be visible in a web browser at localhost:8080.
Creating a Basic Pipeline Job
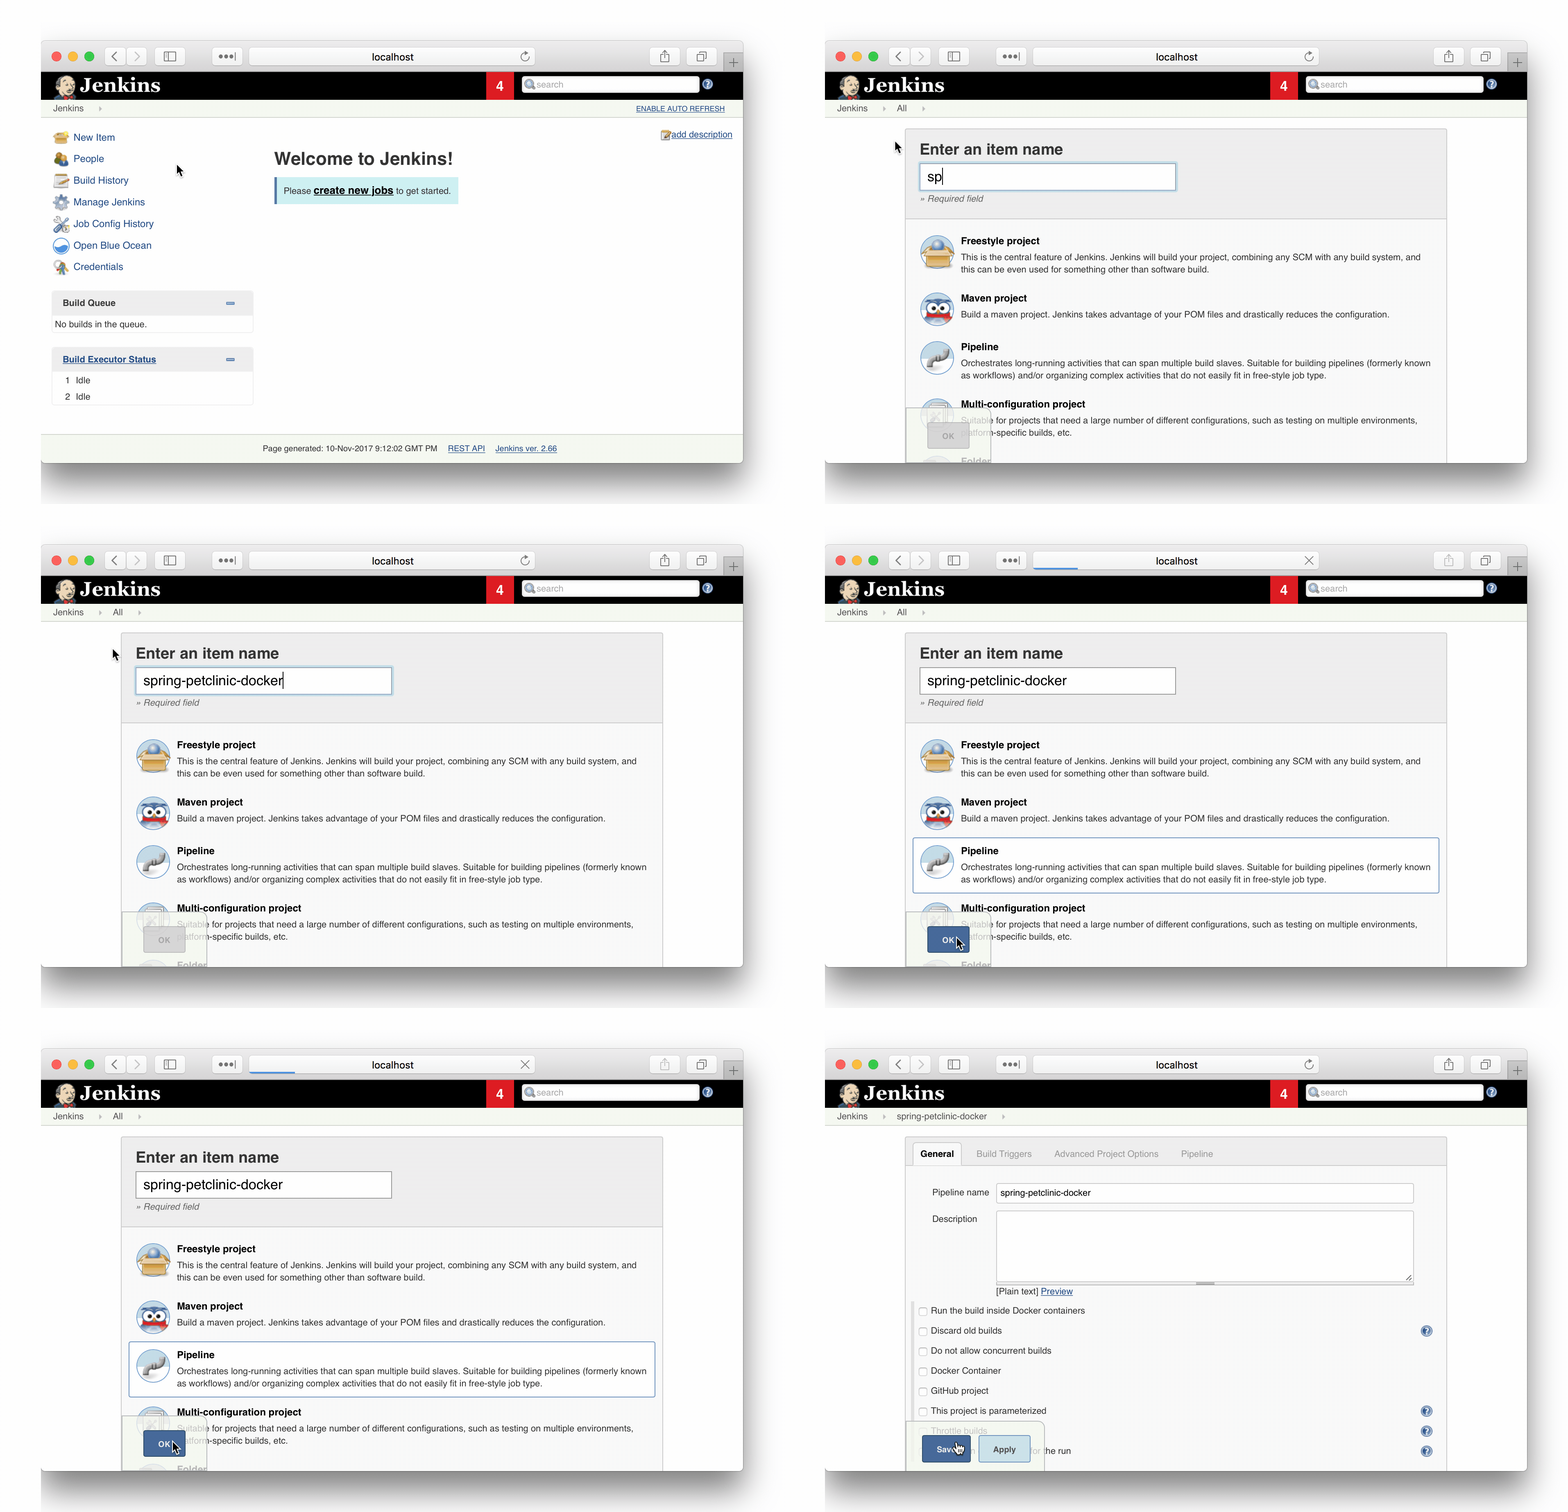
1. Click a new Pipeline job in Jenkins by clicking New Item, naming it, and selecting Pipeline.
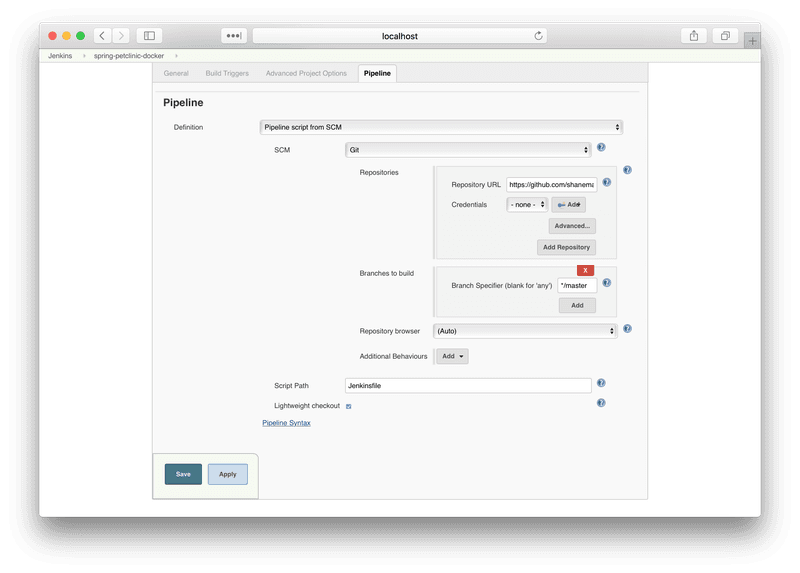
2. Configure the pipeline to refer to GitHub for source control management by selecting Pipeline script from SCM. Set the repository URL to your fork of Spring PetClinic. The URL I’ve entered here is: https://github.com/shanemacbride/spring-petclinic.git.
3. Save the job.
Creating a Dockerfile That Runs Our Java Application
1. Create a Dockerfile that will run the Jar generated by Spring PetClinic building. Create a file named Dockerfile using your favorite text editor. We want to start with a Java image, so specify Anapsix’s Alpine Java image as our base image.
FROM anapsix/alpine-java2. Specify who the maintainer of this image should be using a maintainer label.
LABEL maintainer="shanem@liatrio.com"3. Ensure the image has the Spring PetClinic on it so it can be run. When Spring PetClinic is built, the Jar will be placed in a target directory. We simply need to copy that into the image.
COPY /target/spring-petclinic-1.5.1.jar /home/spring-petclinic-1.5.1.jar
4. Run Spring PetClinic when the container starts up.
FROM anapsix/alpine-java
LABEL maintainer="shanem@liatrio.com"
COPY /target/spring-petclinic-1.5.1.jar /home/spring-petclinic-1.5.1.jar
CMD ["java","-jar","/home/spring-petclinic-1.5.1.jar"]
5. Commit this new file. We aren’t pushing any changes yet because we still need to create a Jenkinsfile for the Pipeline job to execute correctly.
$ git add Dockerfile
$ git commit -m 'Created Dockerfile'
Creating a Basic Jenkinsfile
1. Create a Jenkinsfile to instruct our Pipeline job on what needs to be done. First, create the file named Jenkinsfile and specify the first stage. In this stage, we are telling Jenkins to use a Maven image, specifically version 3.5.0, to build Spring PetClinic. After this stage is complete, it will generate a jar and place it in the target directory.
#!groovy
pipeline {
    agent none
   stages {
    stage('Maven Install') {
      agent {
       docker {
         image 'maven:3.5.0'
     }
  }
  steps {
       sh 'mvn clean install'
       }
     }
   }
 }
2. Run our Pipeline job created before. Make sure to push the Jenkinsfile up to GitHub beforehand. You can run the job by clicking on the clock icon to the right. It should successfully install Spring PetClinic using the Maven image.
$ git add Jenkinsfile
$ git commit -m 'Created Jenkinsfile with Maven Install Stage'
$ git push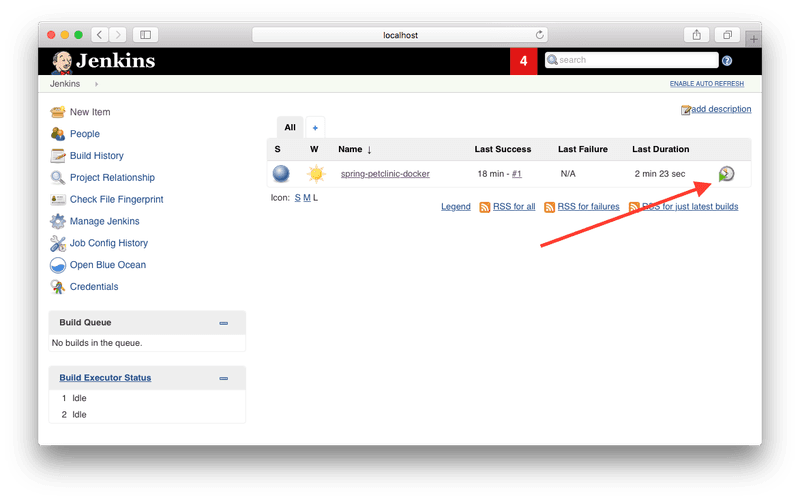
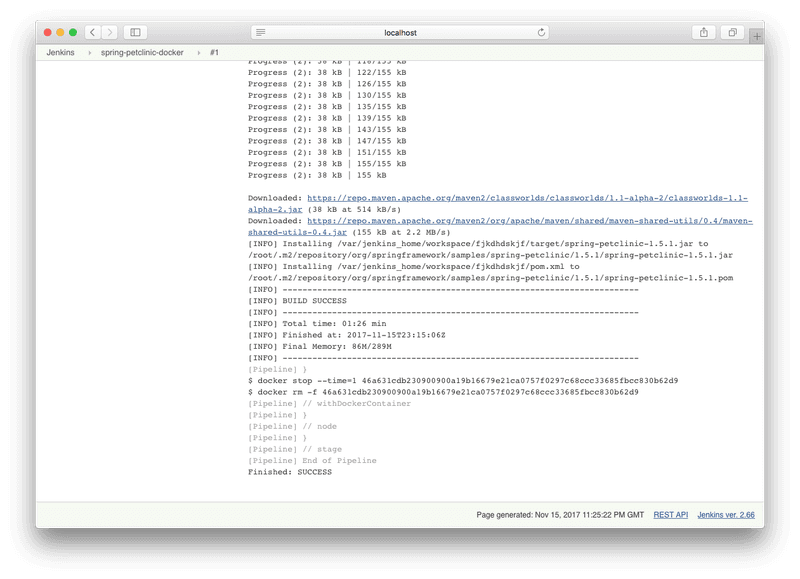
Adding a Docker Build Stage to the Jenkinsfile
1. Confirm Spring PetClinic is successfully installing. Then package our application inside an image using the Dockerfile created previously. It’s time for another Jenkinsfile stage. In this stage, we won’t require a specific Docker image to be used, so any agent will do. The image will be built using the Dockerfile in the current directory, and it will be tagged with my Docker Hub username and repository as the latest image.
#!groovy

pipeline {
  agent none
  stages {
    stage('Maven Install') {
      agent {
        docker {
          image 'maven:3.5.0'
        }
      }
      steps {
        sh 'mvn clean install'
      }
    }
    stage('Docker Build') {
      agent any
      steps {
        sh 'docker build -t shanem/spring-petclinic:latest .'
      }
    }
  }
}
2. Ensure the image was successfully built (it should be if the updated Jenkinsfile is pushed up to GitHub and the job is run again). You can verify this by either looking at the job’s console output or examining your images through the Docker CLI.
$ git add Jenkinsfile
$ git commit -m 'Added Docker Build Stage'
$ git push
$ # Run the Jenkins job which will execute this new stage and wait for it to finish...
$ docker images
REPOSITORY                TAG   IMAGE ID        CREATED          SIZE
shanem/spring-petclinic latest ef41393a932d 28 seconds ago 160MB
3. Verify that our Dockerfile was working as expected now that we’ve built our image by running our new image with port 8080, the port that the Java servlet runs on, forwarded to port 8081. We do this because our Alpine-Jenkins container is already running on port 8080. After it spins up, we should be able to see Spring PetClinic in a web browser at localhost:8081. Awesome!
$ docker run -p 8081:8080 shanem/spring-petclinic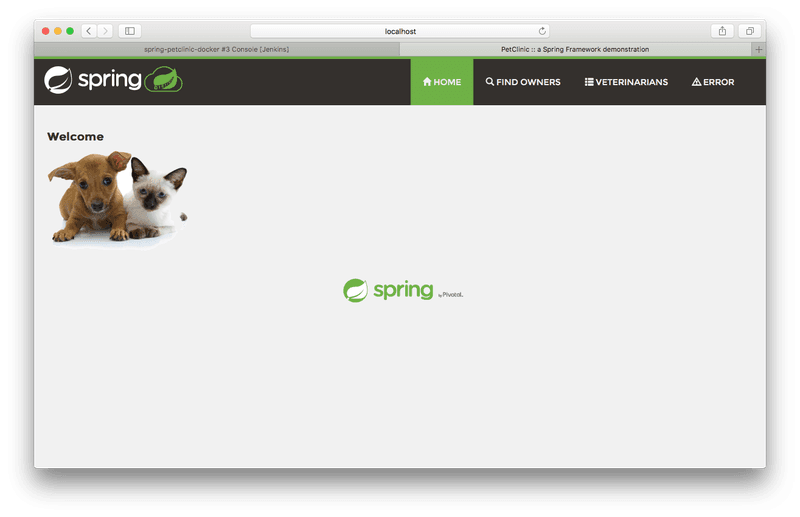
Adding Docker Hub Credentials to Jenkins
Now that we have our application successfully installing and packaging itself into a Docker image, we need to make that image available using Docker Hub.
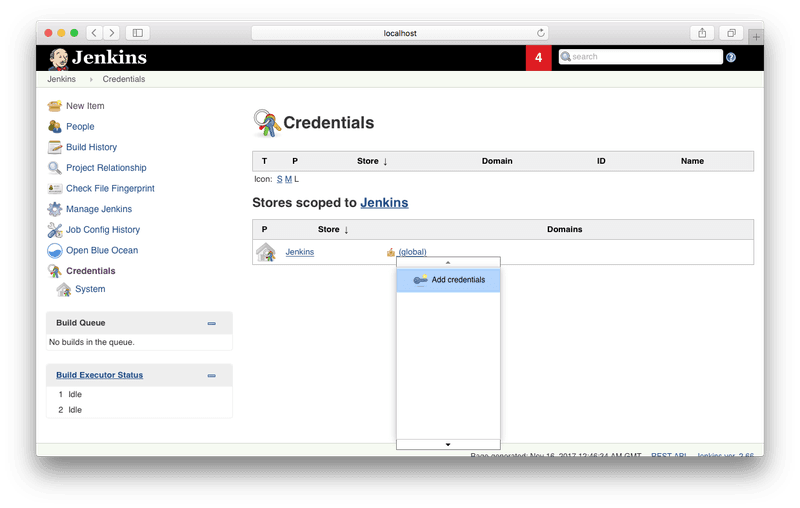
1. Add your Docker Hub credentials into Jenkins. First, click on Credentials from the Jenkins home page.
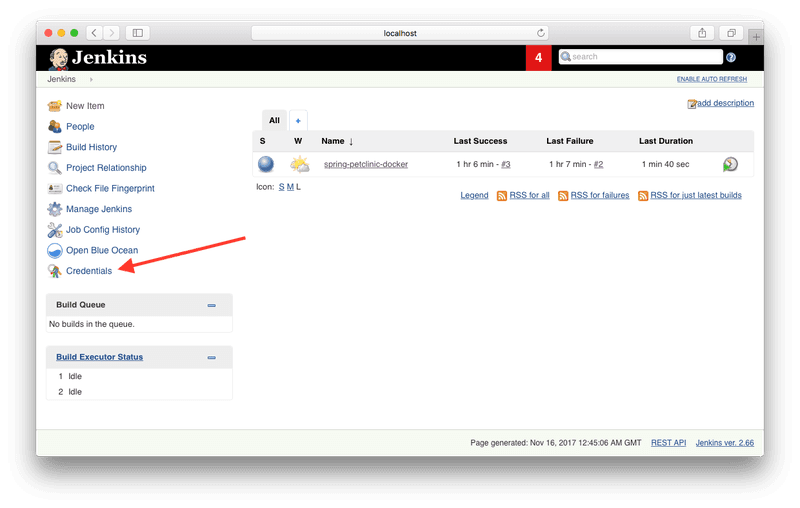
2. Click Add credentials under the global drop down menu.
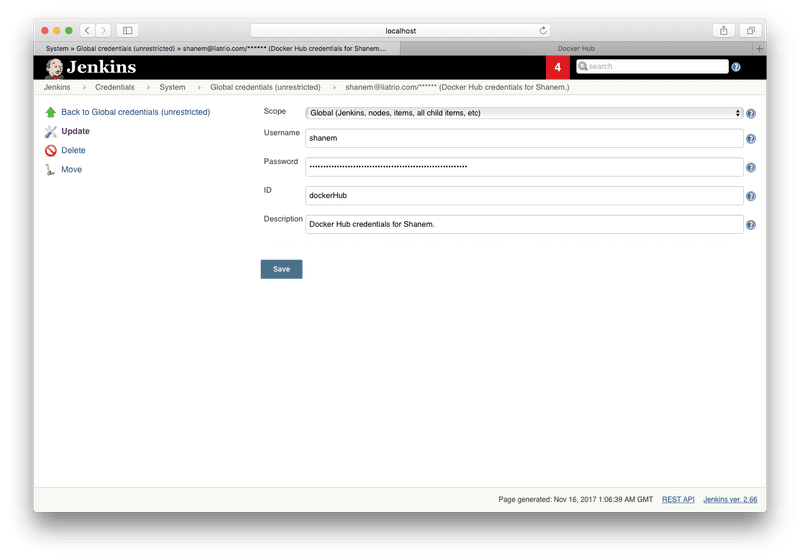
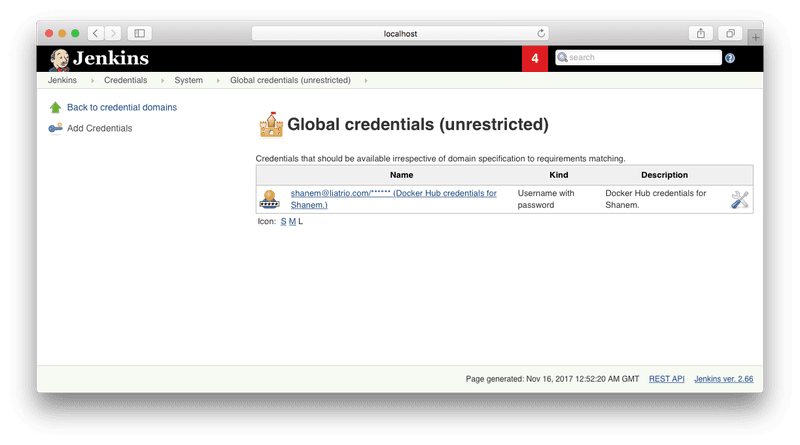
3. Enter your Docker Hub credentials. Make sure to use only your Docker Hub username and not your email address. These credentials will be referenced in the Jenkinsfile using their ID value. Hit OK.
Adding a Docker Push Stage to the Jenkinsfile
Finally, the last stage will be added to our Jenkinsfile that pushes our image up to Docker Hub.
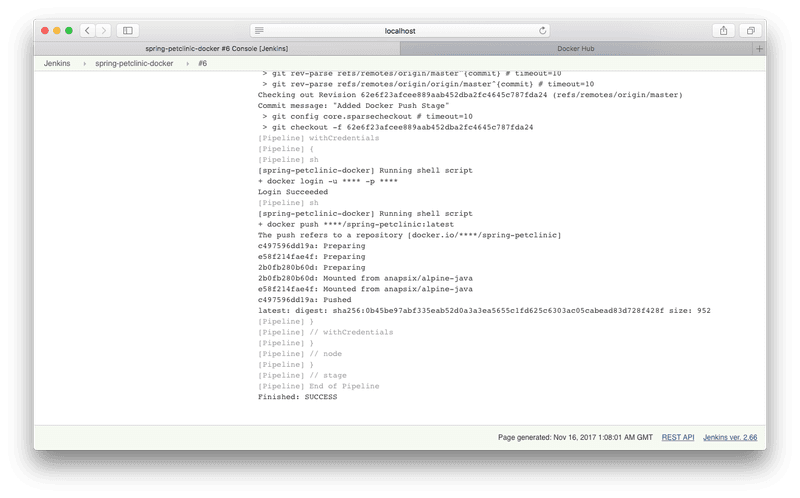
1. Create this stage using any agent because we don’t need to run our Docker CLI commands in a specific image. Using withCredentials, we can specify to use our Docker Hub credentials defined within Jenkins to login to Docker Hub via the Docker CLI and push our newly built image up.
#!groovy

pipeline {
  agent none
  stages {
    stage('Maven Install') {
      agent {
        docker {
          image 'maven:3.5.0'
        }
      }
      steps {
        sh 'mvn clean install'
      }
    }
    stage('Docker Build') {
      agent any
      steps {
        sh 'docker build -t shanem/spring-petclinic:latest .'
      }
    }
    stage('Docker Push') {
      agent any
      steps {
        withCredentials([usernamePassword(credentialsId: 'dockerHub', passwordVariable: 'dockerHubPassword', usernameVariable: 'dockerHubUser')]) {
          sh "docker login -u ${env.dockerHubUser} -p ${env.dockerHubPassword}"
          sh 'docker push shanem/spring-petclinic:latest'
        }
      }
    }
  }
}
2. Commit these changes, push them up to the GitHub repository, and trigger our Pipeline job to build in Jenkins.$ git add Jenkinsfile
$ git add Jenkinsfile
$ git commit -m 'Added Docker Push Stage'
$ git push
$ # Run the Jenkins job which will execute this new stage and wait for it to finish...
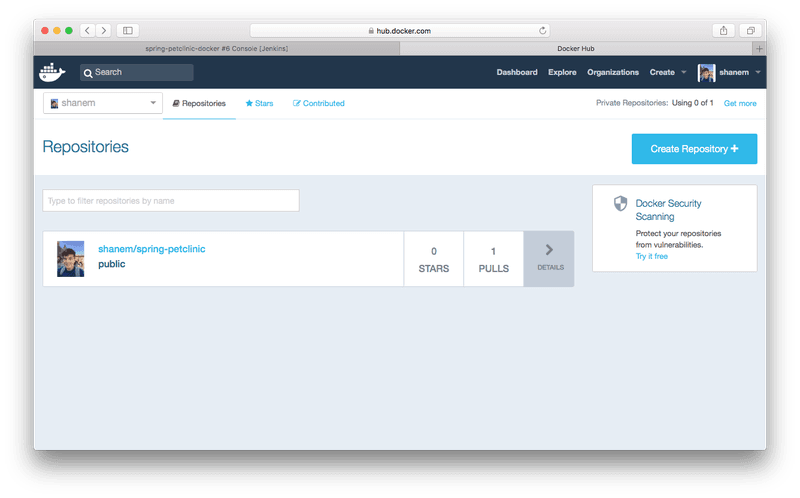
3. Wait for the job to finish running. Your image should now be on Docker Hub. Great!
Next Steps
Here, I introduced some of the capabilities that Jenkins brings to the table when working with containerized applications. If you want to take things a step further, be sure to check out Liatrio’s blog on Local Development with Jenkins Pipelines.
If you have any comments or questions, reach out to us.


